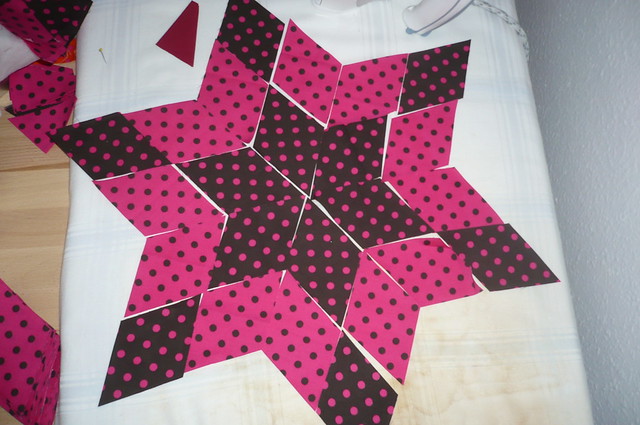
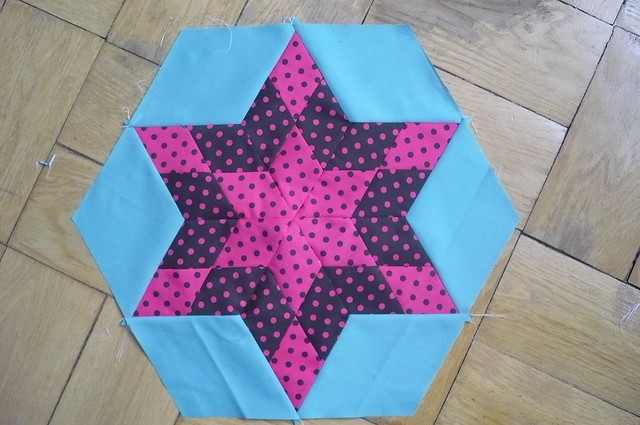
This is what we are going to make today:

What you need:
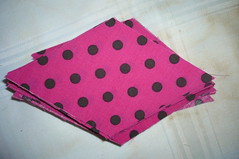
* 12 light coloured 2,5" x 2,5" parallelograms (with alpha being 60°)
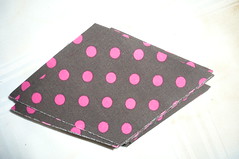
* 12 dark coloured 2,5" x 2,5" parallelograms (with alpha being 60°)
* 6 contrasting 4,5" x 4,5" parallelograms (with alpha being 60°)
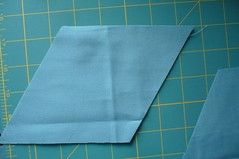
[if you forgot your math: the length of all 4 sides is given, the vertical lines bend by a 60° angle, so if you want to cut several, cut a 2,5" (4,5") strip then cut off a triangle by linging up your 60° mark on your ruler with the edge. After that just line up the 2,5" (4,5") line of your ruler with the bend edge and the straight edge with the 60° line and cut and cut until you have enough pieces]
start with laying out your star:
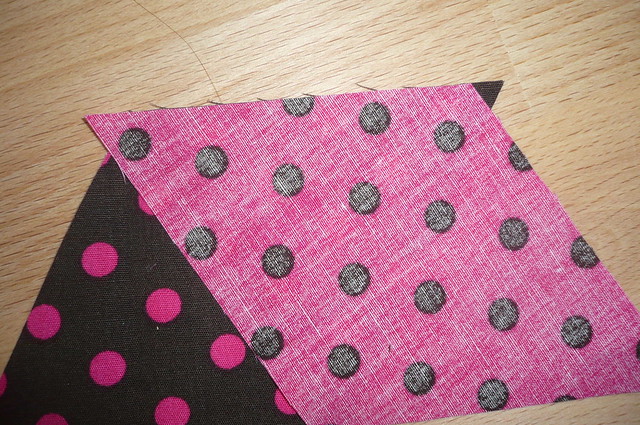
Then pair up the parallelograms or diamonds and sew them together with a 1/4" seam, make sure they
overlap a bit, so you will have an even edge when you press the seam
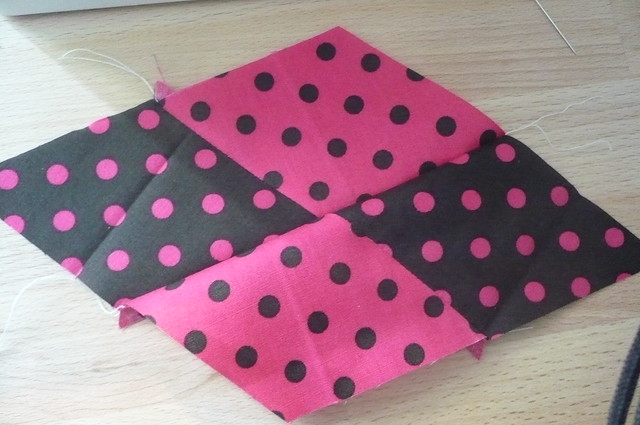
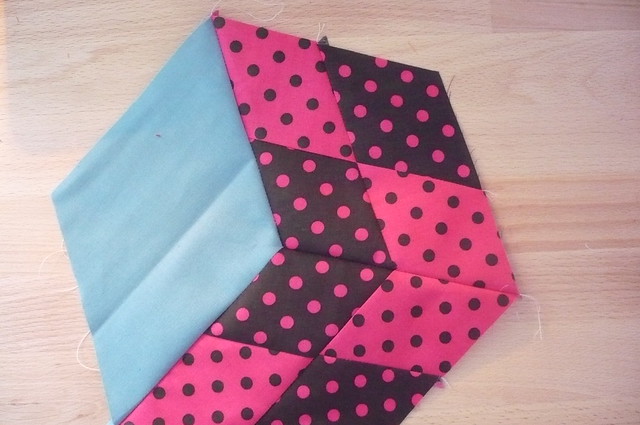
Once you have 2 of the diamond pairs, sew them together to get a bigger diamond:
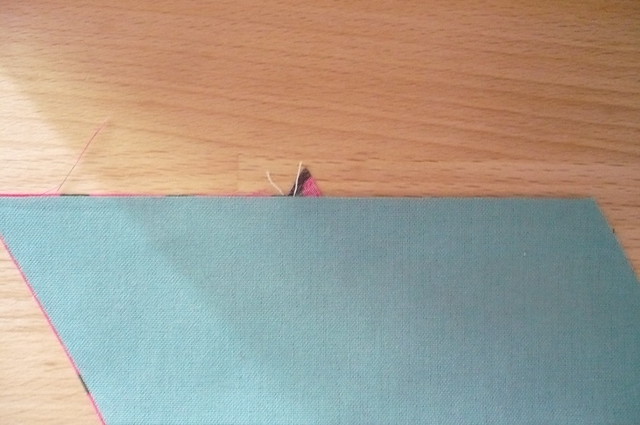
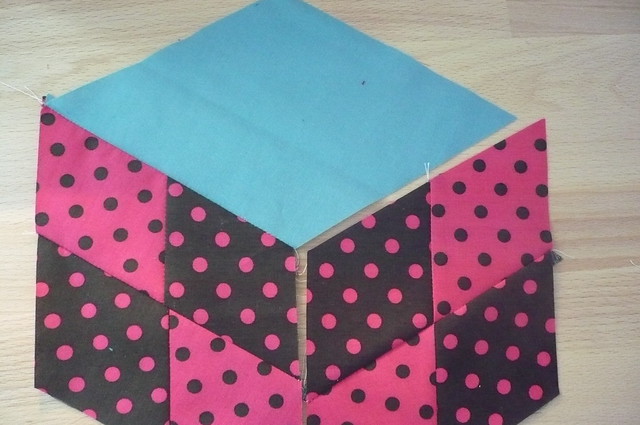
line up the big diamond with the small one and sew them together:
line up the next star spike and start where the other seam is - make sure to fold the bigger diamond back
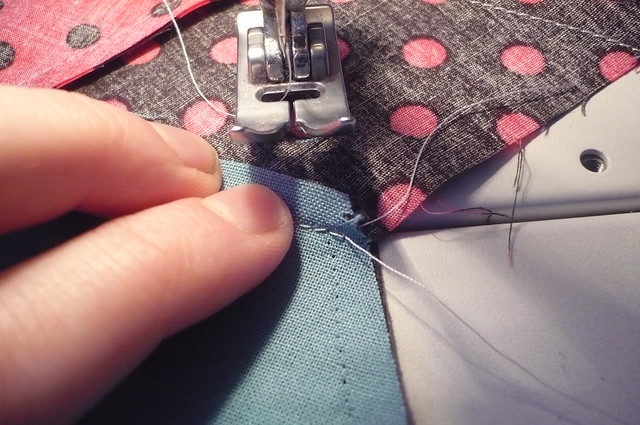
Flip the whole thing and sew the two spikes together, make sure you match the middle seams - again start at the Y-seam (where the 3 meet) and make sure you start 1/4" inward.
Continue until you have half a star
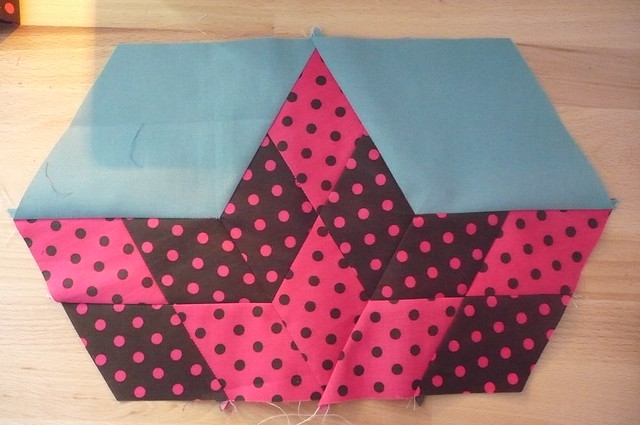
make another half, sew them together, into one big star:
Have fun with the Y-seams!
PS: you can replace the big diamond with a set of 4 small diamonds, if you wish to.
Leo
Hi Leo, you mastered y-seams! I am proud of you. There is actually a way to do this that "looks" the same but without all the trouble. Great job!
ReplyDelete